Tampilkan postingan dengan label cards. Tampilkan semua postingan

Kamis, 12 Mei 2016

With the holidays just around the corner, it is time to start thinking about the cards you will make for friends and family.  This collection features cards for every crafter . . . from the quick and easy card, to the more detailed . . . the one thing that they all have in common is that I used my Cricut to create them.


Follow the links below to see more details for each card.

Pink and Green Argyle Christmas Card
Celebrate Christmas Tree Card
Smiling Snowman Card
Green Rhinestone Christmas Tree Card
Snowman with Scarf Card
Merry Christmas Card
Rainbow Tree Card
Snowman Hug Card 

Read More..

Rabu, 20 April 2016

Today I am going to show you how I used 6 pieces of solid color cardstock to make some beautiful Autumn cards.

For this project I used  two piece of  8 1/2" x 11" kraft cardstock, two pieces of a peachy orange and two pieces of white cardstock.  I started by cutting all of the kraft cardstock in half, so I could fold it over to be the base of the card.


After that, I cut the peachy orange at 5" x 3 3/4" so that it would layer nicely on top of the base and just leave a small border.


Then I cut the white at 4 3/4" x 3 1/2" . . . the photo shows you how the layers will stack on top of each other.


Now for the FUN part!  I grabbed 3 of my Spectrum Aqua water based pens, and water bottle and my Gina K stamps,  I will be using the Youve Got a Friend In Me set for this project.


I took the clear sheet of acetate that comes covers the stamps and scribbled all over it with three colors of pens.  I think that this color combination is perfect for Autumn.


Next, take your water bottle and spray the inked area.  Depending on how you spray will determine your outcome.  Spray far away and you will just get a light mist and it will not disturb the colors . . . spray closer in and you will get lots of water droplets and colors moving and blending.   This means that even if you use the same colors, no two cards will be exactly the same.


Smack that white cardstock down on the inky watery mess.  Once I set mine on top I smoothed over it to blend the colors a little and be sure that I got ink all the way out the the edges of the pieces.


Flip them over and pat yourself on the back for creating something so beautiful!


Here are how all four of my pieces turned out.


Now we have to let them dry.  This is your chance to go work on another project, do some laundry . . . or take a nap . . . might as well since we cannot do anything else with these until they are dry.


Once they were dry I wanted to fill in the areas on some of the pieces where the white was still showing through.  I grabbed my Galaxy Gold ink pad and just ran the whole pad across the pieces of paper.  This filled the white areas, but it also added a light gold shimmer the the entire piece.  The photos dont show the shimmer very well.


Now for the stamping.  I used the trees from the Gina K. stamp set called Youve Got a Friend In Me.  I used a burgundy Spectrum Aqua pend and colored all over the tree stamp, and then stamped it in the lower right corner of the cardstock.


The burgundy color is so deep, it almost looks brown.  And now the trees all have the colors of Autumn on them, just as if the leaves were changing colors.


Then stack the layers, attach to the base and you are done!  Four beautiful cards with the same theme, but each one is unique.  I took photos of each card so you can see how each one is different.  You can also see the gold shimmer ink a little better in the following photos.


This is a great way to make several cards quickly, but still have each one be a truly unique card.
Read More..
January has flown by!  I cannot believe it is just one more week until our first Disney Pixar Blog Hop of 2016!


This year we have decided to have a hop every other month for the entire year.  I know it is a big challenge to ask these crafters to come up with new amazing projects each time, but I know that this group is up to the challenge.  Some of us have been doing these hops together since 2011!  Over the years the following has grown so much that we even have a Facebook Fan Page just for these hops!  Click HERE if you want to like our fan page.  I think it is the best way to know about all of the Disney fun we are up to.

Also, these year we will have some great Disney products for prizes.  I recently attended the Craft and Hobby Association Trade Show (CHA) and while I was there I found several different companies with Disney themed products.  Some of these companies have agreed to sponsor prizes for our hops this year!  If you want to check out my blog post about all of the Disney items I saw at CHA, just click HERE.

Read More..

Minggu, 10 April 2016

If you own a die cutting machine that allows you to cut fonts that you download then I have a deal for you!


Revolge has a Autumn Bundle that includes 53 high quality fonts at a great price and they are offering an additional 15% discount on this bundle if you use the code

MYCUTSEARCH

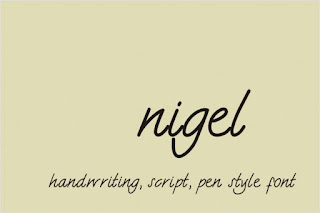
The variety of fonts in this collection is amazing!  There are fancy fonts, simple fonts, script fonts and my personal favorite Madonna Font!  Actually, there are two Madonna fonts!  One of them is specifically for Rebel Heart.

Here is just a small sampling of the fonts included in this bundle.


To see the full bundle and to place your order, head over to Revolge.  Remember to use the code 
MYCUTSEARCH 
at checkout for an extra 15% off the Autumn Bundle.  I have provided additional links below.  Tell them Shawn sent you.

Revolge //  Blog  //  Facebook  //  Twitter

Read More..

Jumat, 08 April 2016

When you are creating Disney themed project and cards you dont have to only use Disney themed papers.

Here is a collection of Disney cards that you can create with your Cricut, using some of the papers and stamp sets you might already have. I have provided links to all of my past posts on these cards below so that you can follow them to find out more information about your favorites.


Click on the links below to go to the blog post about the specific card you like!

Peter Pan card 
Donald Duck cupcake card
Grumpy card
Daisy and Minnie card
Mr. Incredible card
Sleepy card
Pocahontas card
Meeko the racoon card

If you like these, make sure to follow my Facebook page for the Disney Pixar Blog Hops!


We have plans for lots of magical crafting fun this year and you dont want to miss it!
Read More..

Kamis, 07 April 2016

Have you ever pulled cardstock off of a REALLY sticky Cricut mat to have it curl up on you?  Below is a photo of some cardstock I used for a recent project, and you can see how the portion that I peeled off of the mat has a curve in it now.


Yes, I can place it between some heavy books and get it to lay flat again at some point, but I also found something out . . . it is all about how you remove things that causes that curve/curling to happen.  

Most of us would use our spatula to pull up the excess paper, as shown in the photo below, and peel that away leaving the image we cut on the mat.


I found out recently that this is not the best way to remove the cardstock when that mat is SUPER sticky.


The BETTER way is to peel back the mat.


Below is a photo of two pieces where I peeled back the mat instead of the cardstock . . . see how the remaining cardstock is still nice and flat!  If you are making very large cuts it is also better to peel the mat away so that your cuts do not curl up. 


I plan to do another post about this showing the exact same cuts side by side, but peel the cardstock back on one and peel the mat back on the other.  I think that will really show the difference in the technique.


Read More..

Rabu, 06 April 2016

I thought that these cards were the CUTEST IDEA!  Each one comes with a scratch off sticker that you apply over the top of part of the sentiment, and then you add a coin and the person you give the card to gets to scratch off the card to see the sentiment . . . which is usually a punch line to a riddle or joke.


I even got to make one in a Make and Take


These are from Inky Antics // Blog // Facebook 

Read More..

Senin, 28 Maret 2016


Tips for Retrieving Some Hidden Files by Viruses or. On  storage like UBS’s or Memory Cards.

For this we got to know about a great guy called the ‘Command Prompt’.
Its Utility is Really Vast but for now. We’ll limit here and and who knows, later I may Bring more on It. But Please guys,just follow what i do because if you fail to do so, you may ruin your computer and have to re-install the system.


Here is a summary of what you will see in the Slide show.
STEP 1:  Launching We Move ‘starts button’/’All Programs’/’Accessories’

STEP2: Now we may enter the letter of the desired device in the command prompt. In my case it’s ‘J’ as seen in the slide show.

STEP 3 : Hit Enter and  type  ‘attrib -s -h /s /d *.*’ and hit ‘Enter’
And It’s Done everything is visible.  Check out the slideshow if you want the tutorials with pictures.


The last two screen shots show the case when some of my files were hidden and the last one show the results I obtained after taking the steps mentioned above.
This Is a great tips you should know because many files are usually hidden on our PCs by viruses. Even with windows ‘show hidden files option’ nothing is recovered and we all get confused saying they have been eaten up by viruses.
Stay tuned for my next post. To read more of my posts on RANSBIZ click here
Read More..

Sabtu, 19 Maret 2016

Get an Extra 20% Off All Digital Items at Cricut!

Just follow this link!
Read More..